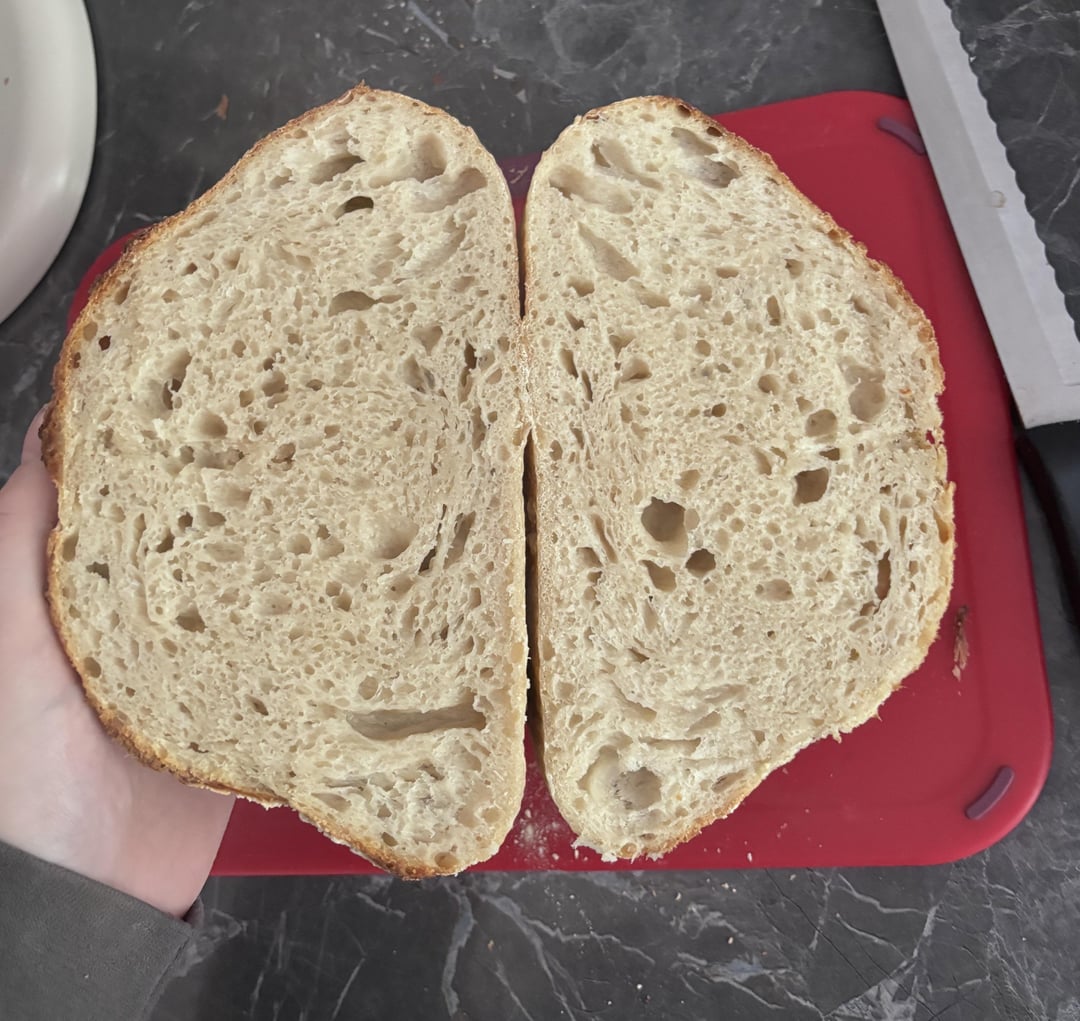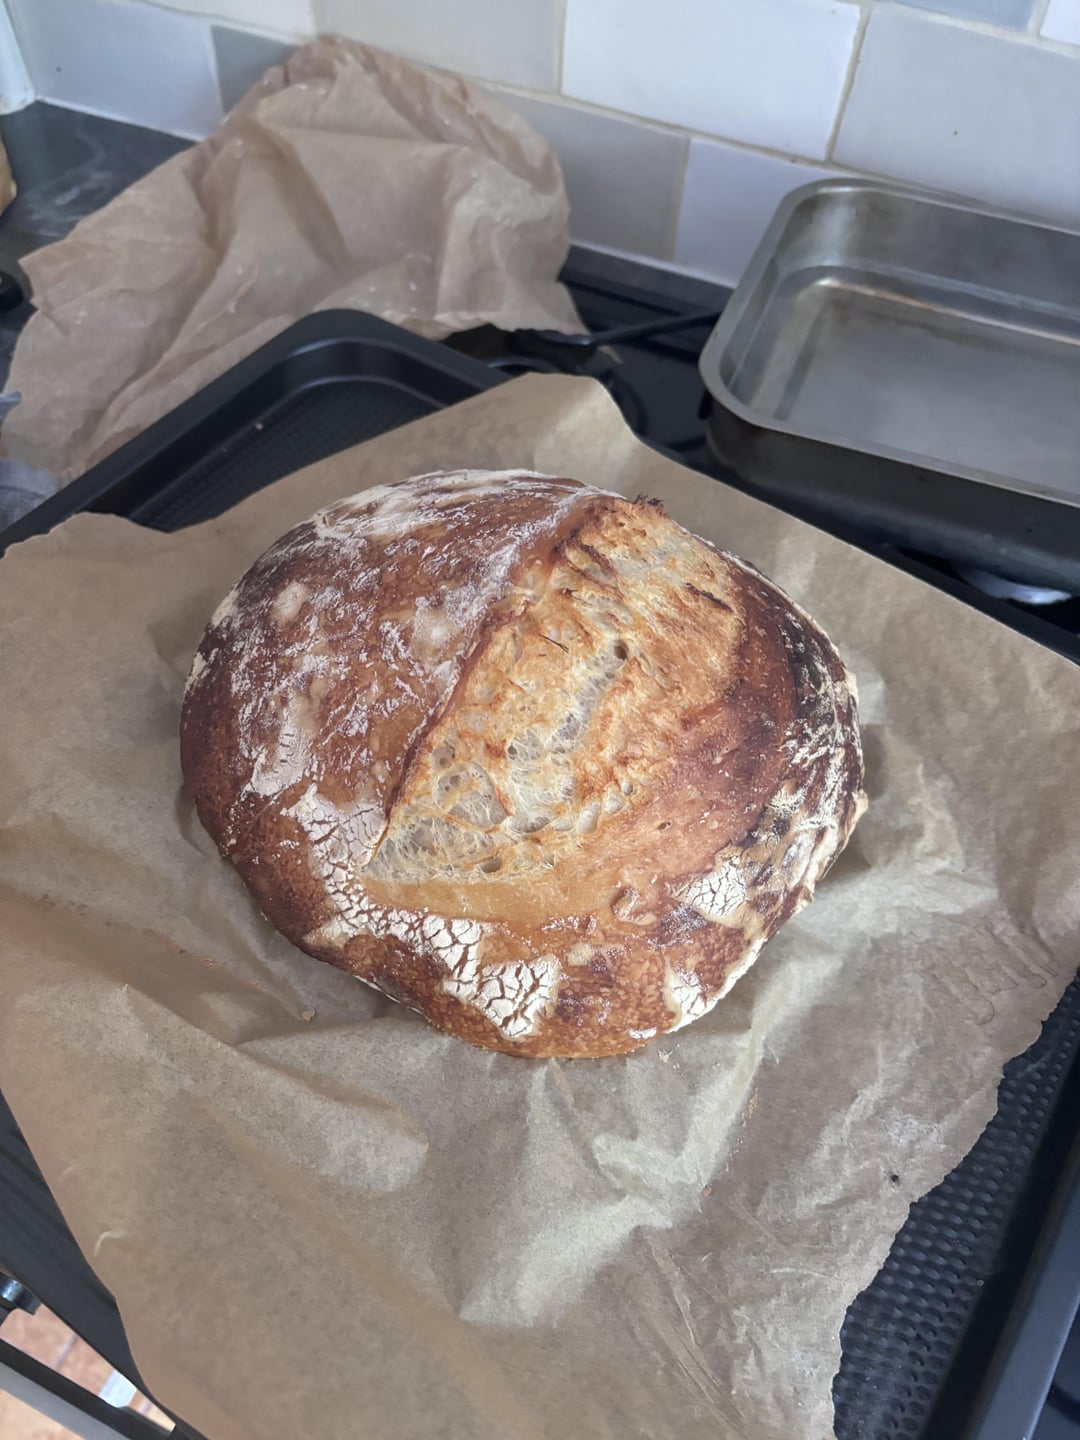

In all honestly I’m super chuffed with my first attempt but wanting some feedback on what I could improve. I open baked this loaf as I don’t have a Dutch oven, and I had to make my score with a rather blunt knife so I’m definitely going to buy some proper tools. Any feedback would be greatly appreciated 🙂
by ell_priv69

2 Comments
[removed]
Hi. Superb first try. Well done. The slight flattening of the viids and the belling out at the bttom indicate that it was just slightly over proofed. As to the utensils you will need, bakers scraper an Lame or more simple a double sided stainless steel razor blade. This us what I usek be careful, and keep it clean and wrapped in it’s waxed paper sleeve.
Hope gh following is of help.
Phases:
• Mixing dough: The start of bulk fermentation.
This is basic method only put dry ingredients in bowl and combine. Add water and levain stir with stiff spoon or hand until all dry flour is combined. At this stage you have a chance to adjust your hydration to suit the flour but, over the next hour or two the flour will absorb more of the free fluids. So, aim for stickier than drier. I work the dough at this stage to a ensure that the dough is binding as a cohesive ‘ball’. Now the dough needs to rest.
Fermentation is a continuous process. Usually split in two. Bulk fermenttion is when multiple loaves are fermented together in one batch. Then proofing after the ‘ bulk ‘ has been reduced to individual loaves and shaped. Often times the proofing is done in refridgerated conditions to refine baking process. Especially with sourdough.
It is important to adjust the point at which the one finishes and the other starts. There needs tp be just enough ‘food’ to sustain the yeast through to baking. This is usually guaged by the % rise in volume of the raw dough. The longer the intended proofing the lower the % age rise. There are several other ways to guage the curtailment point tho.
My preferred rise is about 75%. I measure the volume of the just mixed dough and then finish the ferment in a bowl marked to double that.
Forming gluten:
Several sets of folding and stretching and folding. Starts after a minimum rest of 1 hour autolyse(water absorbtion).
• simple bowl or counter stretch:
The dough will tend to stick to the surface. With wetted fingers tease up the far edge of the dough and lift up as far as it will without tearing, gently. Pull across to other side and lower down to seal on top. Twist 90° and repeat two or three times. When the dough resists, won’t lift, it is time to rest minimum 1/2hr to allow dough to relax. Repeat 3 to four times at 1/2 hour intervals
• Coil fold: bowl or counter. Tease wetted fingers in under edges of dough both sides, lift gently and allow self weight to draw down dough. Drop the near edge down ‘coiling’ the remaining bulk over to the other side. Repeat until the dough will not stretch under own weight. Time to rest dough . Three to four sets in all.
• Lift slap fold: on the counter , strectch dough to about 1″ thick. Reach over with wetted fingers and tease under corners. Lift up ajd across whole swinging the dough away so the dropping free edge slaps down then fold over the held corners and tap down. Repeat 3 to 4 times. Until no more stretch. Repeat sets at 1/2 hour intervals.
These folds are mix and match 3 to 4 sets combined total.
• Letter fold: like laminating; part of shaping process. Stretch dough out to roughly 1/2 ” thick rectangle. Lift far edge over to third point then fold other edge over. Tightly roll dough and pul tuck corners under bulk of dough to tension the boule. Lift and place in prepared banetton ready to proof after a rest of a minimum of 1/2 hour
Happy baking