
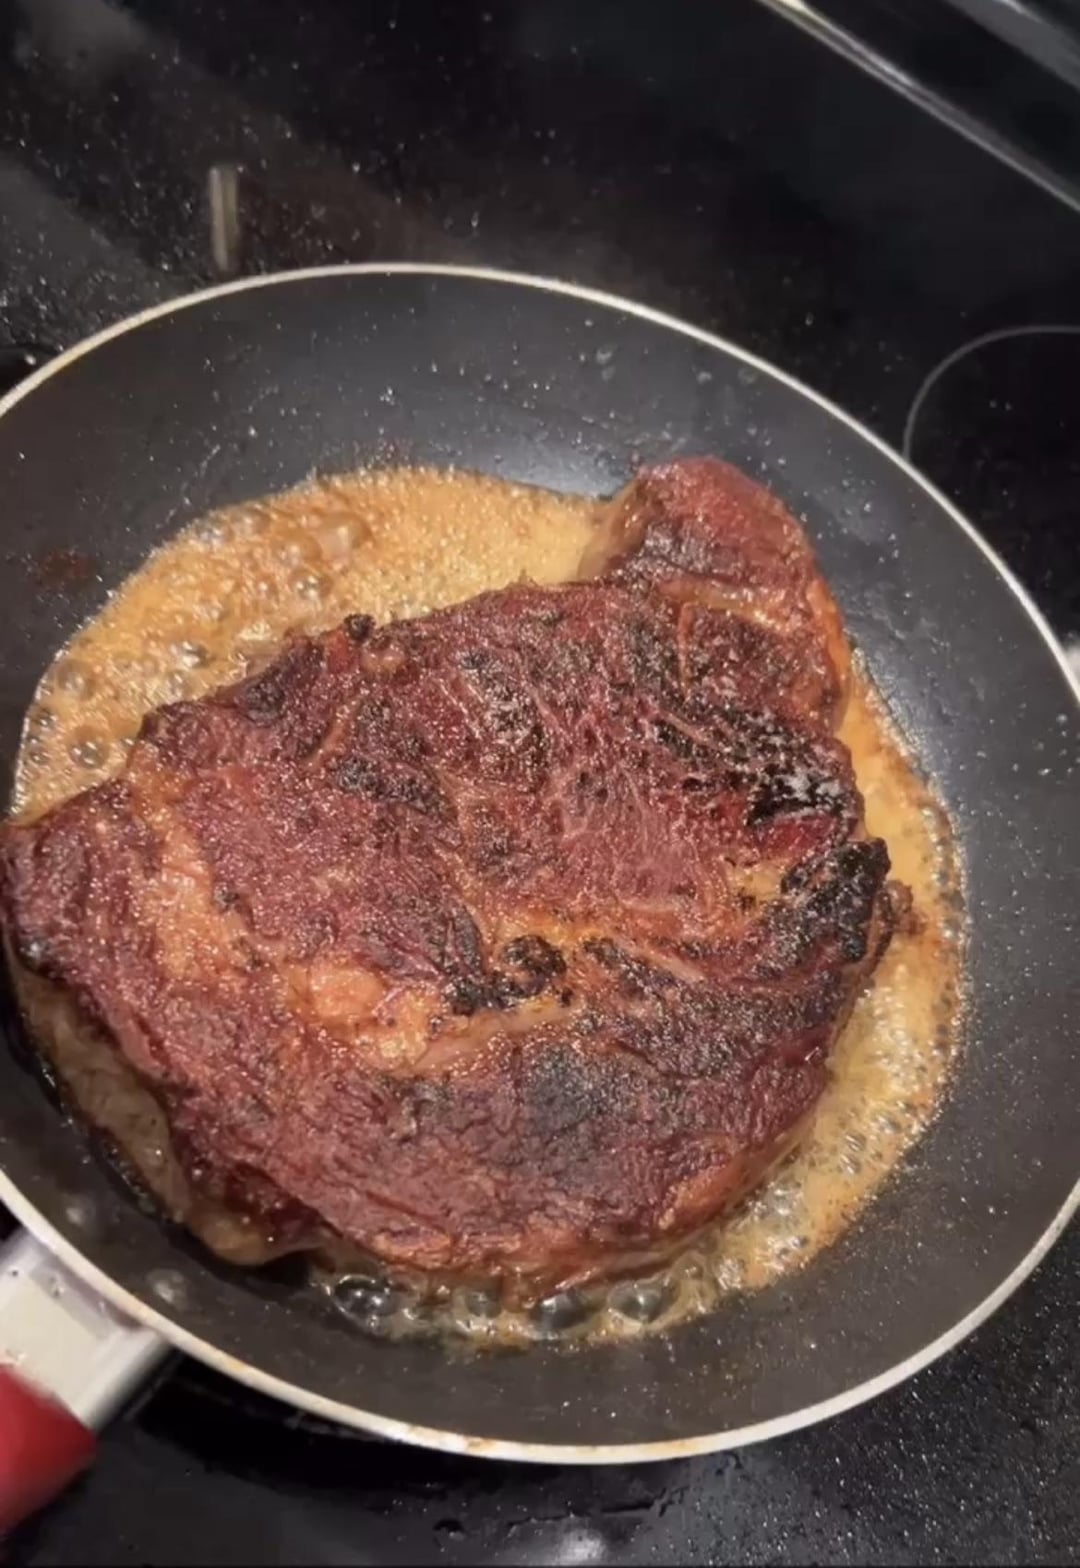
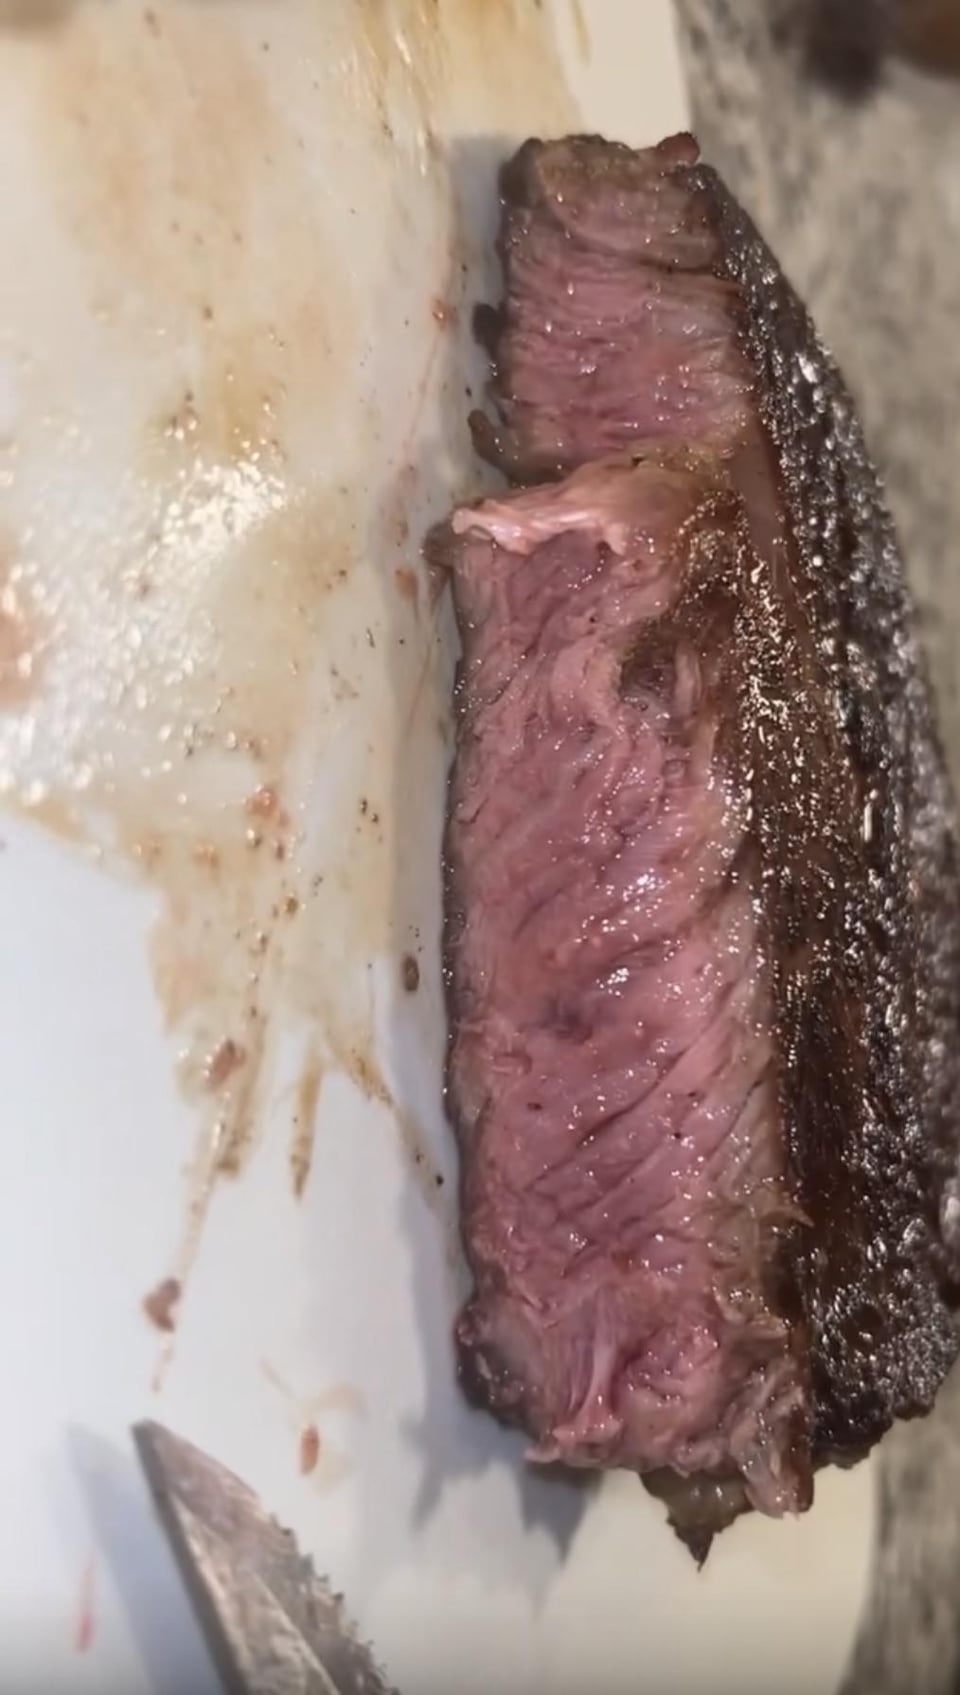
Have been at it for a few months now, really trying to nail the sear and middle. Any advice is welcome!
Currently, I am pulling the meat from fridge and letting it sit out for about 10 min to get an even temp throughout. Then, patting down and applying just a bit of garlic powder, onion powder, salt, and pepper to each side. Searing on high temp with avocado oil for about 1 minute each side until I get the sear I want. Next, I pull the steak and allow it to rest as I clean the pan and prepare for butter basting. I add butter to the pan on medium/high heat and butter baste for about 3 and a half minutes each side until I reach internal temp of 145F-150F.
I know cast iron is the way, looking to get one soon. I also believe adding rosemary and garlic to the basting process would give off more flavor.
Advice welcome! 🙂
by BRLGGS
29 Comments
I need that deep inside my digestive tract
Brother we need lessons from you
(Possible casual flex post, but I’m here for it. Go off)
Get a cast iron pan. If you can afford a good one, do it. Lodge is a cheap and decent pan.
Steak looks good and probably tastes really good as well. Cast iron isn’t going to be much if any better (just keep the temp. <450 if using modern non-stick and you’ll be fine). If you want to try a new type of pan, I’d recommend carbon steel over cast iron given that it is more practical imho.
To maintain that same doneness but more of a sear you can take it straight from fridge to pan and flip it every 30 seconds after initial sear as it develops the crust you want. .
Looks great but I would take it out the fridge for 20 to 30 minutes
It looks really good.
I would argue the non stick pan will only last about five cooks at that heat though. The Teflon simply isn’t compatible with high heat.
Maybe better off with SS or cast iron.
I think that looks really good but if you have the means a thicker cut will give you time to do a reverse sear and then pull and baste.
That looks really good. Obviously a little asymmetrical.
If you wait until 145-150, the carryover cooking will bring it to 155-165, which is going to be med-well to well, which I guess is fine if you like it that way, but most ribeye lovers would consider that a failure.
You don’t have to sear on high heat, but you can if you want. The heat doesn’t need to be past med-high or even med for a good sear — the more important thing is how dry your surface is. The dry brining recommendation above is good for that but you should still pat the surface with a paper towel so it comes away almost dry right before you place it in the pan. And while one side is cooking, the other side will get wet, so pat it dry as well right before you flip it to sear the other side.
Most people would take the steak out for longer than 10 minutes – 45 minutes to a couple hours, but it’s been pretty much proven that bringing the meat to room temperature is not necessary and doesn’t affect the outcome as long as your steaks don’t start off extremely cold/frozen
Cast-iron or carbon steel is great, but if you’re using a glass top or contact stove top, stainless steel will be a lot easier to work with in most cases, and will get extremely hot, extremely fast. But again, the sear does not have to happen all at once And will happen throughout cooking the steak if you flip it a few times and keep the surfaces dry at first contact.
I also agree about buying a thicker cut (1.5-2.0″) getting a new thermometer like the top voted comment for the same reason.
Butter basting is not necessary. It’s been proven that it’s pretty much indistinguishable from adding infused melted butter at the very end, which is a lot easier. You can do either, but the result will be the same, so my advice is to go the easier route and cook the steak to your desired level of doneness, and infuse your butter closer to the end so again, it’s easier and more mistake proof.
If you’re cooking for 2, give this a go. Don’t skimp on the salt, crust that thang. The entire process always delivers.
https://prepd.commerceowl.com/recipe/perfect-Porterhouse-steak
That looks perfect.
That pan is giving you straight PFAS poisoning thanks DuPont but yes get a cast iron asap
Nailed it.
Get a wire rack to go in the fridge, salt all sides of your steak and leave them in your fridge overnight. The salt will run throughout the meat, and your exterior will be dry and get a better overall crust (not that yours is bad).
Good job
This is no shade on OP at all – nice piece of meat.
But what is with all the nonstick pan posts all of a sudden??
I’d eat that.
No advice. Steak is beautiful. I am jealous.
Daaaammmnn! Nailed it!!
The difference between what you made and all the extra stuff is really not that big of a deal. Some techniques are better for different cuts but for what you’re cooking right there, it won’t get much better. Marinade, seasonings, aging… all good but I always prefer the basics
That looks so good
Yeah I agree get a cast iron pan pre seasoned would be choice if not just get one and season it yourself. Never wash it with dish soap just water and then turn on your stove put it over the burner let it dry and then melt a little butter and rub it in with a paper towel to keep it nice and oiled.
looks good to me
First thing you do when you return home with a steak is unwrap it and salt it. You should be cooking it within two days of purchase from a grocery store. Leave it unwrapped, in the fridge, until 30 min before you plan to cook it.
Your searing process is unnecessary, but I don’t think it will negatively affect the final product. It’s just superfluous.
You’re correct that incorporating fresh rosemary and garlic cloves to the basting process will be an improvement.
Otherwise, it looks like you know what you’re doing.
Edit:
You’re cooking for the same amount of time on each side. I can tell this from the uneven color, i.e. there’s more grayish color on top. You need to cook one minute less on the second side because there is residual heat from cooking the first side that will continue to cook the meat.
Gd I’m hungry now
That is a beautiful char
good steak but cooking it on teflon is insane
Basting the top during cooking is underrated, IMO
Teach us.
Season ribeye heavily only using kosher salt & fresh-ground cracked pepper – set it on counter for 60 min.
Outside: Grill on Weber using charcoal – no lighter fluid; use a chimney with wadded-up newspaper as fire starter – wait 20-25 min till coals are rocket hot & grey – dump & spread hot coals into Weber, place grate on grill, and put lid on top w/vents 75% closed – wait 5-7 min – remove lid, scrape hot grate with tin foil – put steak on – turn 90 degrees at 1-1/2 min – flip at 3-1/2-4 min – several butter pats on cooked side – rotate 90 degrees at 1-1/2 min – flip at 3-1/2-4 min – more butter pats on 2nd cooked side – insert instant-read ThermoPen – at 125 internal, take steak off grill, more butter pats, place on cutting board & tent w/foil – rest for 10 min – eat it up!
Inside: Cast iron 10-12” skillet – set skillet on stovetop eye on med high – get it very hot – until water drops instantly dance & disappear – turn fan on for smoke – place steak in skillet – let it sizzle 2 min & sear a crust on each side – put several butter pats on top & insert Meater remote thermometer, & stick cast skillet in 250 degree oven – cook undisturbed until Meater alerts 125 degree medium rare – remove skillet – take cooked steak & place on cutting board & tent w/foil – wait 10 min – eat it up!
Pro tip: Oven cook slow at 250 will give a uniform med rare pink color from the edge to the center. Just like the pictures in cookbooks. Beefy flavor of a well-cooked steak doesn’t need any spices beyond S & P.
This seems like its perfect.